

If you have any questions, you can reach us in several ways
1. Toll Free Support Line : +1-888-860-4800 option 1
2. Email Support : support@money.net
3. Chat Support on the help page.
For billing queries, you can reach us in one of two ways:
1. Toll Free Support Line : +1-888-860-4800 option 2
2. Email Billing : billing@money.net
Money.Net can be run in two ways
1. From the downloadable desktop application. This is the recommended way to run Money.Net and is the best solution if you are using your own computer. The installation required is much smaller than a full Java installation and you will note improved speed and stability. You can get the desktop application by going to www.money.net/download.
2. In a web browser (like Internet Explorer or Firefox). To run in a browser you will need install a free browser plug-in called Java. You can get Java by going to www.java.com. This is a good solution if you are using a computer that is not your own or that you do not have permission to install software on.
Quick Links:
Money.Net Platform Overview
In Money.Net, you can create up to twenty completely customizable views. In each view, you can add multiple modules, resize modules, and customize all colors and settings for each module.
Top Banner Area
The top banner area is a permanent header.
Search: The search bar allows for you to type in ticker symbols and immediately pop open a Tear Sheet overview, or send to other module types.
Indices/Stocks: The default top banner shows the three main US Equity Indices (DOW, S&P, NASDAQ) and 2 or 3 other stocks. You can fully customize this top banner and show up to six indices and/or stocks (depending on your screen size and resolution). To customize your top banner, click on the Settings wheel and then on "Configure Top Banner". Enter your labels (what you want to see them called) in the left hand blanks and the ticker symbols in the right hand blanks. Click OK. Make sure to click the save icon when finished and choose “Save Now”. (shown to the right).
Navigation Menus: In the top banner are the main navigation and preference menus. From left to right they are the: Save Menu, Settings Menu, "Views", "Modules", “Toolkit”, "Speed Desk", "Research", “TV Clipster”, and
"Excel” (shown to the right).

“Help” menu: The help menu selection next to Settings will open our easy to use contact form in your default web browser. You can also access live support chat on the bottom left of that page.
News Sounds Icon: The microphone icon (second farthest from the right) will toggle your news sounds between Human Squawk (breaking news read by a live person), Automated Squawk (major headlines read out loud by computer), simultaneous Automated and Human Squawk, Bell Ding for major headlines, Classical Music, and Silent.
How to Navigate
In this section we will cover each of the navigation menus.
Views
The first nine entries in the menu are the default Views. You can think of Views as virtual desktops inside of Money.Net. Each View can be customized to have any modules that you want in them (explained later in the guide). The default Views can be changed or removed at your preference. They are simply examples of common views that someone might create.
The “Views” menu looks like this.

Modules
The “Modules” menu looks like this.

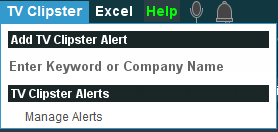
TV Clipster
Using this menu you can set keywords that will trigger and alert you when your keyword is mentioned on the most popular financial news networks. You simply enter a phrase like “apple” or “Elon Musk” in the blank and press your enter key. To manage your previously created alerts, you can click on “Manage Alerts” in the menu.
The “TV Clipster” menu looks like this.
Toolkit
The “Toolkit” menu looks like this.
Click the downward chevrons at the bottom to see more choices.

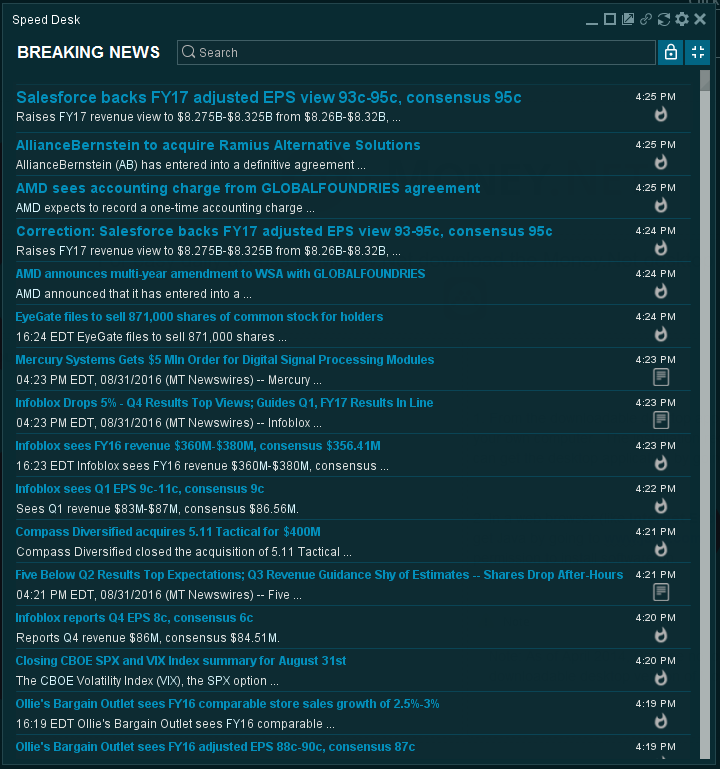
Speed Desk
The Speed Desk is the fastest way to see the most important news of the day when you don't have time to view every headline. For the news hound with a busy schedule.
The Speed Desk looks like this.
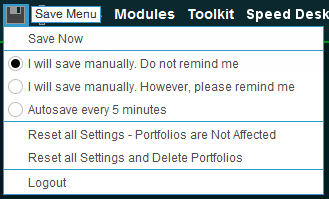
Settings
The “Settings” menu looks like this.

In Money.Net, you will be employing modules to view the data that you want to see. As discussed earlier in the guide, the default Money.Net view contains examples of several types of modules. There are currently twenty-five types of modules that you can use when setting up your views. Modules can be thought of as a “window” to data on the “desktop” that is a view. Modules can be moved, resized, and named to your liking.
In this section we will cover each of the modules available to you.
Tips and Customization
There are many features and modules available in Money.Net. Because no two users are exactly alike, there are also a lot of ways to customize your Money.Net experience like changing colors, module sizing, and arranging modules in your Views.
In this section we will cover the major features that you can change and configure.
Tips and Customization
Auto-hide Controls (Smart Corners)
The Money.Net platform features intuitive and interactive "Smart Corners" that maximize the visible portions of modules to easily view more information. Smart Corners limit the amount of unused space on your screen by making the headers and scroll bar of each module window disappear when not being accessed. This maximizes the viewable size of the core of the module. To view the header of a module, simply mouse over the module and the smart corners will make the header and scroll bars instantly reappear.
To turn Smart Corners on or off, simply click the Settings wheel at the top left of the platform and then check or uncheck the box next to "Autohide Controls".
Arranging Your Modules
If you start with a brand new View (explained above) or want to re-arrange the Modules in your current view you have a few options.
Resize
Move your cursor to the edge of the module that you wish to resize until you see a double arrow, then left-click and drag to a preferred size.
Drag and Drop
Move your cursor to the Title Bar of the module that you wish to move. Then left-click and drag your module to a new location.
Tile and Cascade
Accessible from the Modules menu, this allows you to quickly organize and size all of the modules in your current view. It can also be used to gain control of a module that seems hidden or out of the bounds of your view.
Always on Top
This allows you to always view a specified module on top of all the other modules, regardless of your moving them around or sizing other windows. This feature is accessible from each module by right clicking the Title Bar of the module and selecting "Always on Top".
Duplicate
If you really like the module that you have created and would like another one, use the duplicate feature. This feature is accessible from each module by right clicking the Title Bar of the module and selecting “Duplicate”.
Import Portfolios
You can import your pre-made portfolio information into the Money.Net software. To import your portfolios from other websites or software applications, your portfolio will need to be in a specific format called “Comma Separated Values” format or CSV. Most applications (including Excel) will allow you to export data in CSV format.
Preparation and Formatting
To see an example file of how to set up your data for import, click the Settings wheel -> Import Holdings from a File -> Give me an example of the TXT input format. You will then be given the opportunity to save the file named “Import Portfolio Sample.txt” to a location on your computer. You can open this file with the spread sheet program of your choice (Excel is suggested). You are also welcome to use a simple text editor, but it may be more tedious. Follow the pattern in the file to add your own symbols, shares, purchase dates, and base prices. Here is what the format looks like:
When finished editing your portfolio, you will want to Export it as CSV with quotes around all of your values. If you edited your portfolio with a regular text editor, you can simply save the file.
If you have any problems with the import process, we are happy to help you convert to the proper format. You can contact us in any of the methods shown at the beginning of the guide.

Importing the File
To import your custom portfolio file, click on the Settings wheel->Import Holdings from a File->Import Holdings via TXT file (shown to the right). You will be prompted to browse for your custom file. Don’t worry if you don’t immediately see your portfolio, you still need to use the drop down menu in a Quote Grid module to select it for viewing (also shown to the right).


Adjusting Money.Net Colors
Clicking on the Tools menu and selecting “Configure Colors” will take you to the Layout and Colors options for the entire platform. You can see what the menu looks like in the image to the right.
Using the drop down menu next to “Apply Skin” will allow you to choose from a few pre-set color packs for the platform. The drop down menu right after the word “to” will let you select which modules (or the entire platform) you would like to apply your color pack to.
If you would like to change individual colors of the background of the platform or set a skin for it, you can do so here as well.

To change the individual colors of any one module, you will need to click on the settings icon in the upper right of the module to access its color options. It looks like a small gear and can be seen below. You can see what that looks like to the right.

Linking Modules
Linking modules is a quick way to see the data that you want to see without all of the extra clicks. When a module is “linked” to your Quote Grid, you will be able to single click on tickers in your quote grid and have all of the linked modules attempt to load data related to your selection. The icon to enable linking looks like a chain link and can be seen to the right. It will light up green when enabled.
Linking is available for the following modules: Charts, Snap Quote, Radar, News, Option Chain, and Time and Sales Tracker.


Market Data Coverage